GitLab Runner
目录
注意
本文最后更新于 2024-04-30,文中内容可能已过时。
摘要
1 安装GitLab Runner
1.1 使用官方源安装
curl -L https://packages.gitlab.com/install/repositories/runner/gitlab-runner/script.rpm.sh | bash1.2 使用国内源安装(推荐)
新建 /etc/yum.repos.d/gitlab-runner.repo,内容为
cat > /etc/yum.repos.d/gitlab-runner.repo <<'EOF'
[gitlab-runner]
name=gitlab-runner
baseurl=https://mirrors.tuna.tsinghua.edu.cn/gitlab-runner/yum/el$releasever-$basearch/
repo_gpgcheck=0
gpgcheck=0
enabled=1
gpgkey=https://packages.gitlab.com/gpg.key
EOF
再执行
yum makecache
yum -y install gitlab-runner    #安装指定版本
yum -y install gitlab-runner
1.3 注册信息到gitlab
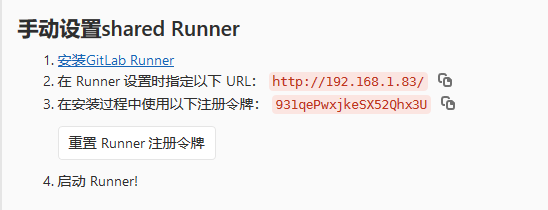
gitlab-runner register部分信息如图

Please enter the gitlab-ci coordinator URL (e.g. https://gitlab.com/):
## 输入你的gitlab地址
http://192.168.1.83

Please enter the gitlab-ci token for this runner:
## gitlab的token(在gitlab的Admin Area中) 或者仓库的token(仓库->设置->Runner)
931qePwxjkeSX52Qhx3U

Please enter the gitlab-ci description for this runner:
## Runner描述信息
[gitlab-server]: my-runner

Please enter the gitlab-ci tags for this runner (comma separated):
## Runner的标签 可以指定仓库 只使用固定标签的Runner构建
my-tag

Please enter the executor: docker, docker-ssh, parallels, shell, kubernetes, custom, ssh, virtualbox, docker+machine, docker-ssh+machine:
## 输入runner运行的平台和方式
docker

Please enter the default Docker image (e.g. ruby:2.6):
your-image  ## 运行的docker镜像
alpine:latest

Runner registered successfully. Feel free to start it, but if it's running already the config should be automatically reloaded!
Runner就安装完了

2 配置CI/CD
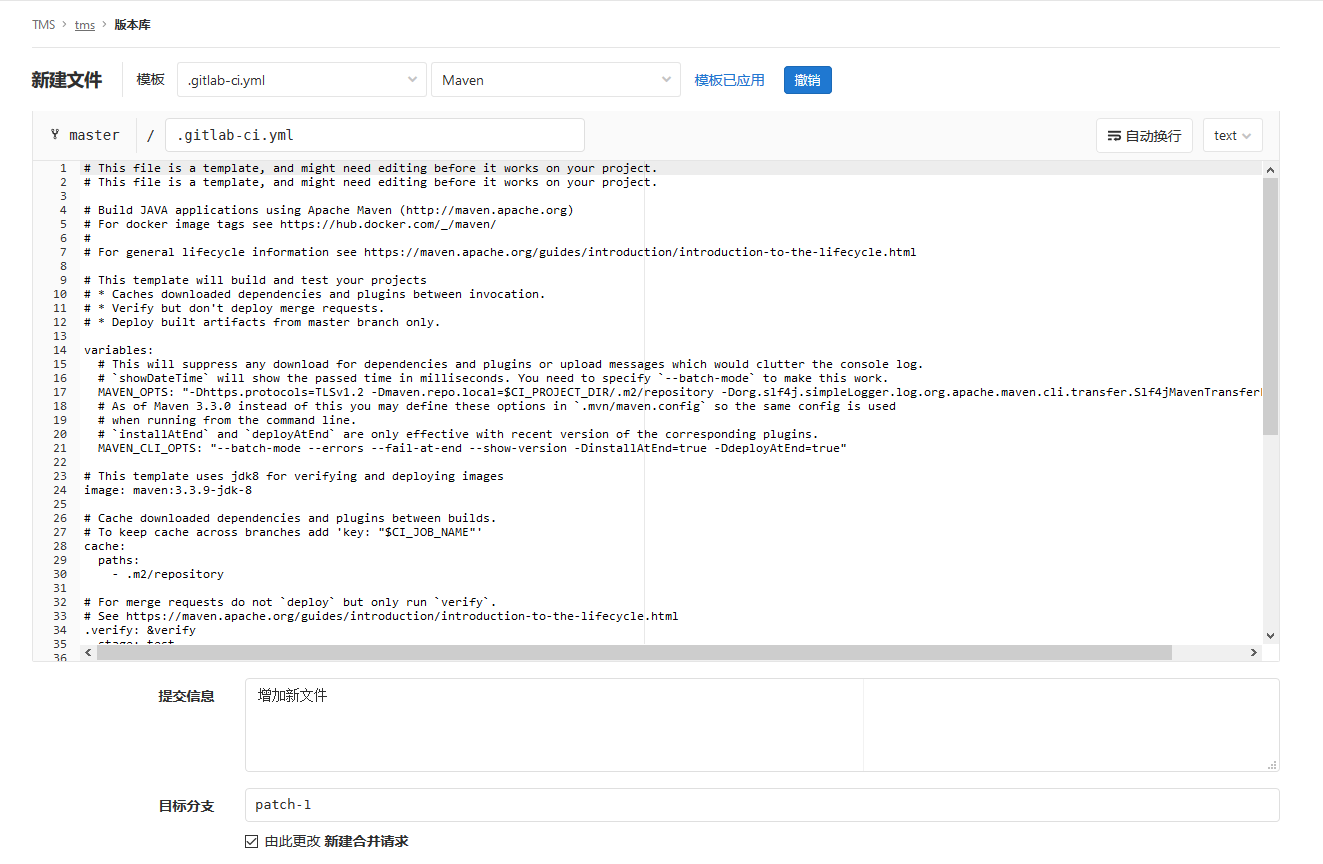
在项目中新增.gitlab-ci.yml文件

根据自己的需要进行修改或编写,具体使用方法不做介绍。
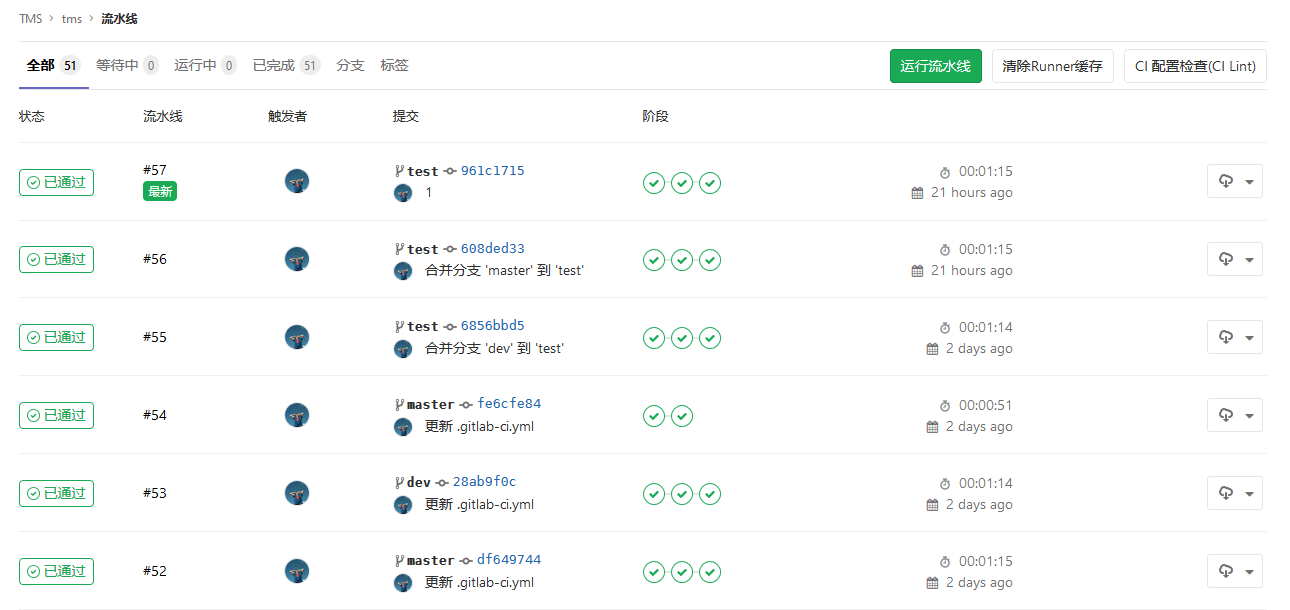
最终实现效果
